1.准备工作
硬件:华为云HECS
软件环境:LNMP,Linux Centos 7.2,Nginx 1.22.1,Mysql Ver 14.14 Distrib 5.7.40, PHP 8.0.26
2.环境安装
2.1Nginx安装
1.获取与系统版本匹配的nginx rpm包
wget http://nginx.org/packages/centos/7/noarch/RPMS/nginx-release-centos-7-0.el7.ngx.noarch.rpm

2.建立nginx的yum仓库
rpm -ivh nginx-release-centos-7-0.el7.ngx.noarch.rpm

3.安装nginx
yum install -y nginx

4.启动nginx,同时设置开机自启动
systemctl start nginx
systemctl enable nginx

5.打开浏览器访问ip地址,出现welcome nginx说明安装成功

2.2 安装Mysql
1.获取mysql rpm包
wget -i -c http://dev.mysql.com/get/mysql57-community-release-el7-10.noarch.rpm
wget -i -c https://mirrors.cloud.tencent.com/mysql/yum/mysql-5.7-community-el7-x86_64/mysql-community-client-5.7.10-1.el7.i686.rpm

2.建立mysql的rpm仓库
rpm -ivh mysql57-community-release-el7-10.noarch.rpm

3.下载mysql
yum -y install mysql-community-server --nogpgcheck

4.启动mysqld服务并且设置开机自启动
systemctl start mysqld
systemctl enable mysqld

5.查看mysqld服务运行状态
systemctl status mysqld
//有如下结果说明mysql安装成功
● mysqld.service - MySQL Server
   Loaded: loaded (/usr/lib/systemd/system/mysqld.service; enabled; vendor preset: disabled)
   Active: active (running) since 二 2022-12-13 10:39:11 CST; 11s ago
     Docs: man:mysqld(8)
           http://dev.mysql.com/doc/refman/en/using-systemd.html
 Main PID: 5940 (mysqld)
   CGroup: /system.slice/mysqld.service
           └─5940 /usr/sbin/mysqld --daemonize --pid-file=/var/run/mysqld/mysqld.pid

12月 13 10:39:06 hecs-35106 systemd[1]: Starting MySQL Server...
12月 13 10:39:11 hecs-35106 systemd[1]: Started MySQL Server.

查看mysql版本
mysql -V
mysql  Ver 14.14 Distrib 5.7.40, for Linux (x86_64) using  EditLine wrapper

6.配置mysql密码
获取mysql安装时自动配置的密码
grep 'temporary password' /var/log/mysqld.log

7.mysql加固
mysql_secure_installation

Securing the MySQL server deployment.

Enter password for user root:    #输入上一步骤中获取的安装MySQL时自动设置的root用户密码
The existing password for the user account root has expired. Please set a new password.

New password:  #设置新的root用户密码
注意:mysql5.7默认密码策略要求密码必须是 大小写字母 ,数字 ,特殊字母的组合,至少8位

Re-enter new password:   #再次输入密码
The 'validate_password' plugin is installed on the server.
The subsequent steps will run with the existing configuration of the plugin.
Using existing password for root.

Estimated strength of the password: 100
Change the password for root ? ((Press y|Y for Yes, any other key for No) : N   #是否更改root用户密码,输入N

 ... skipping.
By default, a MySQL installation has an anonymous user,
allowing anyone to log into MySQL without having to have
a user account created for them. This is intended only for
testing, and to make the installation go a bit smoother.
You should remove them before moving into a production
environment.

Remove anonymous users? (Press y|Y for Yes, any other key for No) : Y   #是否删除匿名用户,输入Y
Success.

Normally, root should only be allowed to connect from 'localhost'. This ensures that someone cannot guess at the root password from the network.

Disallow root login remotely? (Press y|Y for Yes, any other key for No) : Y   #禁止root远程登录,输入Y
Success.

By default, MySQL comes with a database named 'test' that anyone can access. This is also intended only for testing, and should be removed before moving into a production environment.

Remove test database and access to it? (Press y|Y for Yes, any other key for No) : Y   #是否删除test库和对它的访问权限,输入Y
 - Dropping test database...
Success.

 - Removing privileges on test database...
Success.

Reloading the privilege tables will ensure that all changes
made so far will take effect immediately.

Reload privilege tables now? (Press y|Y for Yes, any other key for No) : Y   #是否重新加载授权表,输入Y
Success.

All done!
2.3 安装PHP
1.查看是否已经安装过php
php -v
2.卸载低版本php
yum remove -y php*
3.安装yum工具类库
yum install -y yum-utils
4.更换yum源
yum install -y https://dl.fedoraproject.org/pub/epel/epel-release-latest-7.noarch.rpm
yum install https://rpms.remirepo.net/enterprise/remi-release-7.rpm
5.为PHP 8启用流模块:
yum-config-manager --disable 'remi-php*'
yum-config-manager --enable remi-php80
6.安装php8及其扩展
yum install -y php
//yum install -y php-{extension_name}
yum -y install php-tidy php-common php-devel php-pdo php-mysql php-gd php-ldap php-mbstring php-mcrypt php-fpm
7.查看php是否安装成功
php -v
PHP 8.0.26 (cli) (built: Nov 22 2022 17:44:09) ( NTS gcc x86_64 )
Copyright (c) The PHP Group
Zend Engine v4.0.26, Copyright (c) Zend Technologies
8.配置nginx的default.conf,取消ipv6监听,同时配置nginx,实现与php联动
server {
listen 80;
root /usr/share/nginx/html;
server_name localhost;
#charset koi8-r;
#access_log /var/log/nginx/log/host.access.log main;
#
location / {
index index.php index.html index.htm;
}
#error_page 404 /404.html;
#redirect server error pages to the static page /50x.html
#
error_page 500 502 503 504 /50x.html;
location = /50x.html {
root /usr/share/nginx/html;
}
#pass the PHP scripts to FastCGI server listening on 127.0.0.1:9000
#
location ~ .php$ {
fastcgi_pass 127.0.0.1:9000;
fastcgi_index index.php;
fastcgi_param SCRIPT_FILENAME $document_root$fastcgi_script_name;
include fastcgi_params;
}
}
7.重启nginx服务,启动php-fpm服务,并设置开机自启动
systemctl restart nginx
systemctl start php-fpm
systemctl enable php-fpm
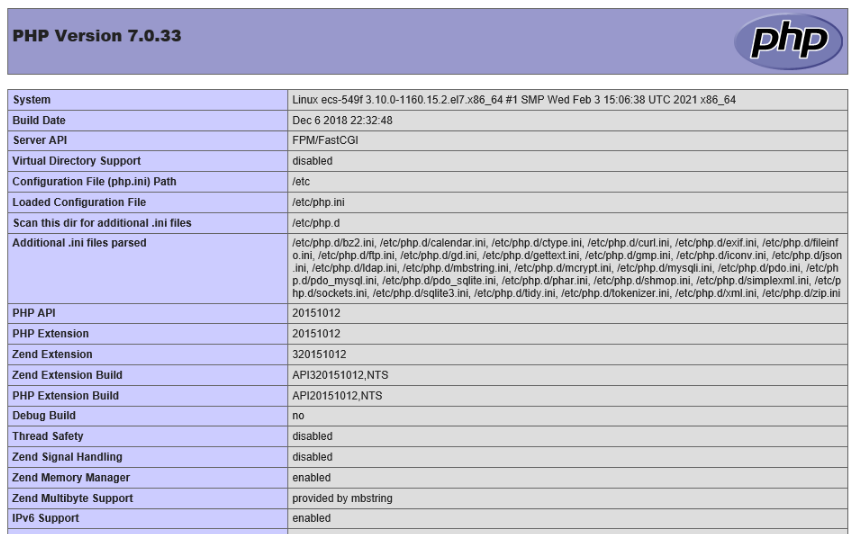
8.验证环境配置
echo "<?php phpinfo(); ?>" >> /usr/share/nginx/html/index.php
访问ip地址出现如下结果说明配置成功
3.配置数据库
1.创建数据库
CREATE DATABASE wordpress;

2.创建数据库用户
CREATE USER 'user'@'localhost' IDENTIFIED BY '123456';

3.对新创建的用户授予全部权限
GRANT ALL PRIVILEGES ON wordpress.* TO 'user'@'localhost';

4.刷新权限使配置生效
FLUSH PRIVILEGES;
4.安装和配置Wordpress
1.删除网站根目录下用于测试php-nginx的index.php文件
rm -rf /usr/share/nginx/html/index.php

2.下载并解压wordpress.   /usr/share/nginx/html为网站根目录
wget https://cn.wordpress.org/wordpress-6.1.1-zh_CN.tar.gz
tar zxvf wowordpress-6.1.1-zh_CN.tar.gz

3.设置解压后的wordpress文件权限
chmod -R 777 wordpress

4.修改wordpress配置文件
cp wp-config-sample.php wp-config.php //将原配置文件备份
vi wp-config.php
找到文件中 MySQL 的部分,并将相关配置信息修改为 配置 WordPress 数据库 中的内容
// ** MySQL settings - You can get this info from your web host ** //
    /** The name of the database for WordPress */
    define('DB_NAME', 'wordpress');

    /** MySQL database username */
    define('DB_USER', 'user');

    /** MySQL database password */
    define('DB_PASSWORD', '123456');

    /** MySQL hostname */
    define('DB_HOST', 'localhost');

5.将wordpress中的文件全部复制到网站根目录下直接访问ip地址可以安装,否则需要访问对应的文件目录,如http://ip/wordpress
5.安装成功后续问题处理
5.1上传主题提示413 Request Entity Too Large
修改/etc/nginx/nginx.config,在http{}中加入 client_max_body_size 20m;然后重启nginx服务
5.2上传主题时提示上传的文件大小超过php.ini文件中定义的upload_max_filesize值。
修改/etc/php.ini中upload_max_filesize的值upload_max_filesize = 20M,重启php-fpm服务
5.3上传主题时无法创建目录 wp-content/uploads/2022/12。它的父目录是否可以被服务器写入?
在wp-content文件夹下创建uploads文件夹,并且修改文件夹权限
chmod -R 777 wp-content/
5.4上传文件提示WordPress需要访问您网页服务器的权限。 请输入您的FTP登录凭据以继续。
方法1:chown设置目录权限
chown www:www -R /usr/share/nginx/html
直接设置网站所在的目录权限。
方法2:设置当前网站文件权限
define(“FS_METHOD”,”direct”); define(“FS_CHMOD_DIR”, 0777); define(“FS_CHMOD_FILE”, 0777);
文档信息
- 本文作者:wendaocsmaster
- 本文链接:https://wendaocsmaster.github.io/2023/02/02/Individual-site-with-wordpress/
- 版权声明:自由转载-非商用-非衍生-保持署名(创意共享3.0许可证)